Clawscan: Configuration and Installation Guide
Welcome to the official deployment documentation of Clawscan. Follow this guide sequentially to ensure a successful infrastructure setup within your Azure tenant.
📋 Installation Workflow
The installation is divided into four logical steps. Please complete them in the following order:
| Step | Document | Subject |
|---|---|---|
| [1] | Shared Mailbox Setup | Provision the dedicated email account for scan inputs/outputs. |
| [2] | Azure Resource Group Creation | Establish the logical container for all Clawscan cloud resources. |
| [3] | Azure AI Foundry Configuration | Set up the AI/ML environment for advanced threat analysis. |
| [4] | Azure Container Job Setup | Deploy and configure the core scanning engine environment. |
Shared Mailbox Setup [1]
This step involves preparing the data entry point for Clawscan. The shared mailbox will receive emails to be analyzed and serve as the outgoing interface for scan reports.
1. Create the Shared Mailbox
Log in to the Microsoft 365 Admin Center.
- Navigate to Teams & groups > Shared mailboxes.
- Click + Add a shared mailbox.
- Name:
Clawscan Engine - Email:
scan@your-domain.com
2. Register Application for API Access
- Go to Azure Portal > Microsoft Entra ID > App Registrations.
- Click + New Registration named
Clawscan-Mail-Access. - Copy the Application (client) ID and Directory (tenant) ID.
- Under Certificates & secrets, create a New client secret and save its Value securely.
3. Set Advanced API Permissions
| Type | Name |
|---|---|
| Application Level | Mail.ReadWrite |
| User Delegate | Mail.Read.Shared |
[!IMPORTANT] Vous devez cliquer sur Grant admin consent for [Your Organization] pour activer ces droits.
Azure Resource Group Creation [2]
To create a Azure Ressource Group, follow these steps :
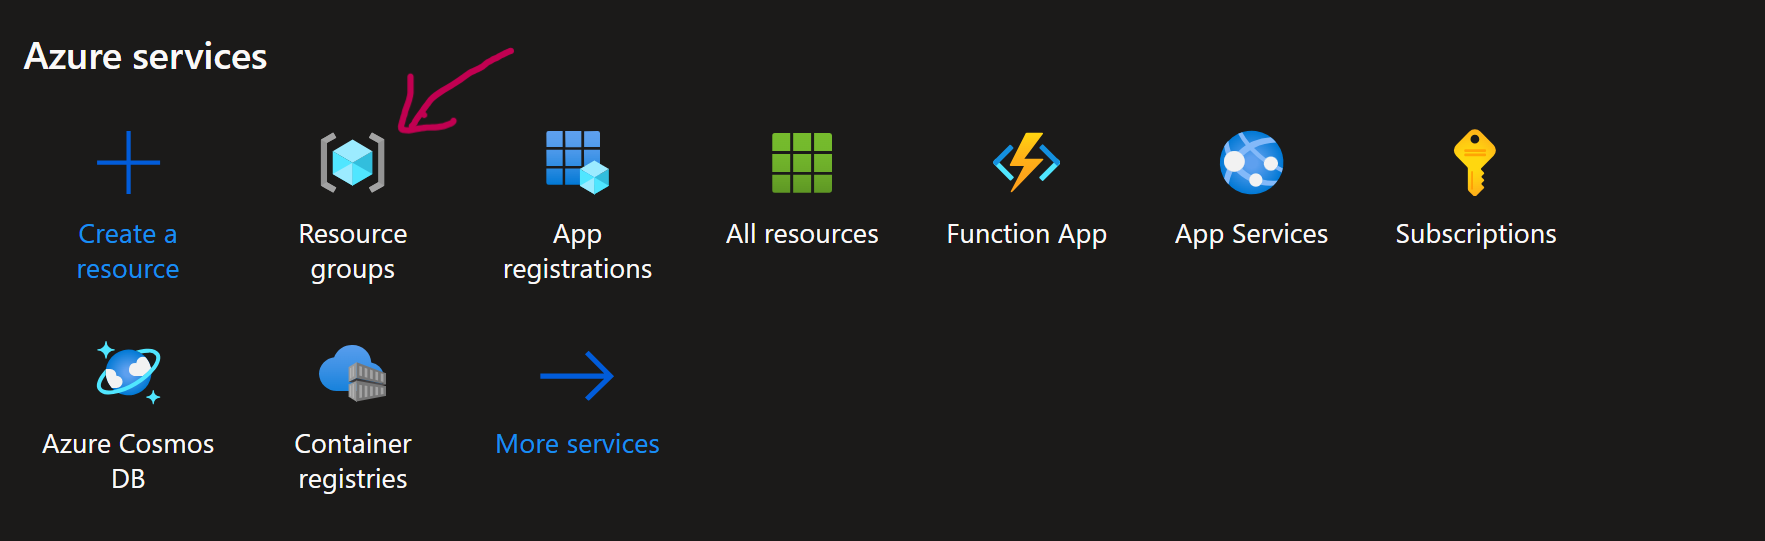
Create a new ressource an choose Ressource Group.
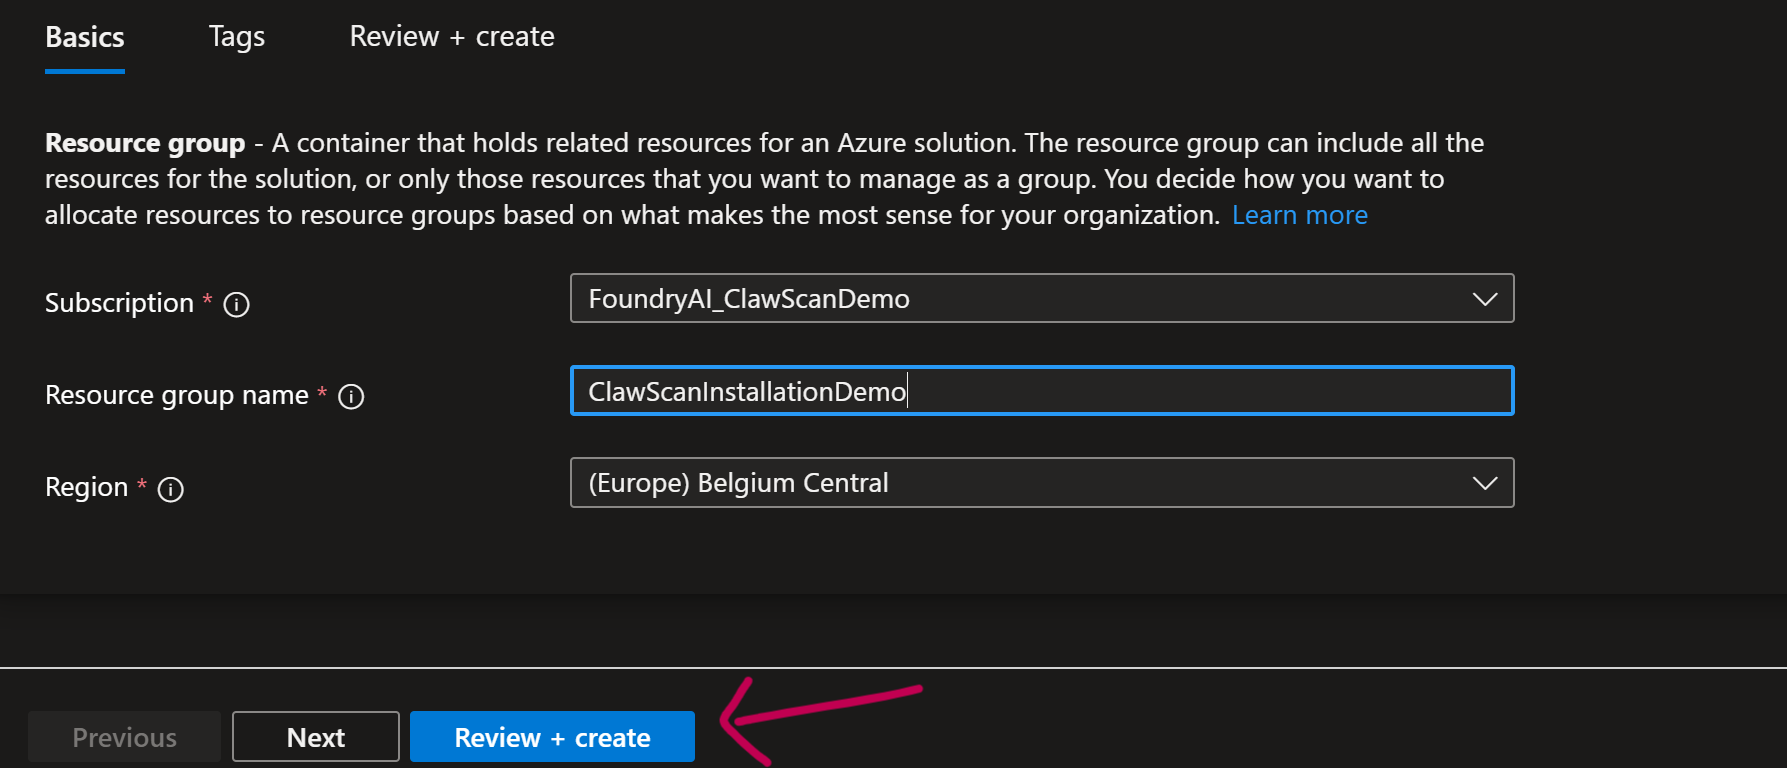
Choose you subscription, the name of the ressource group (here ClawScanInstallationDemo) and the region.
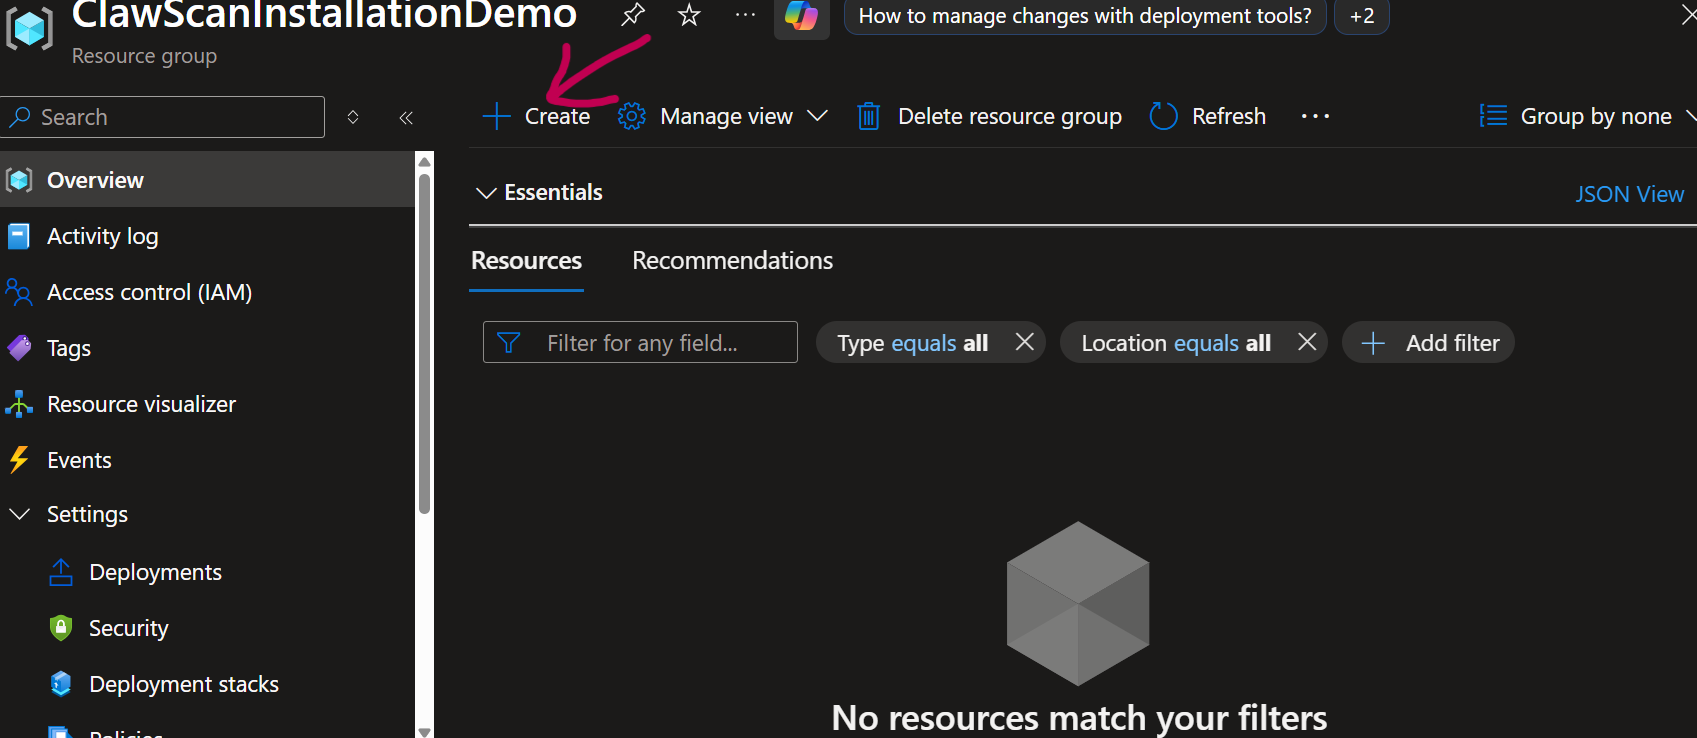
Click on create.
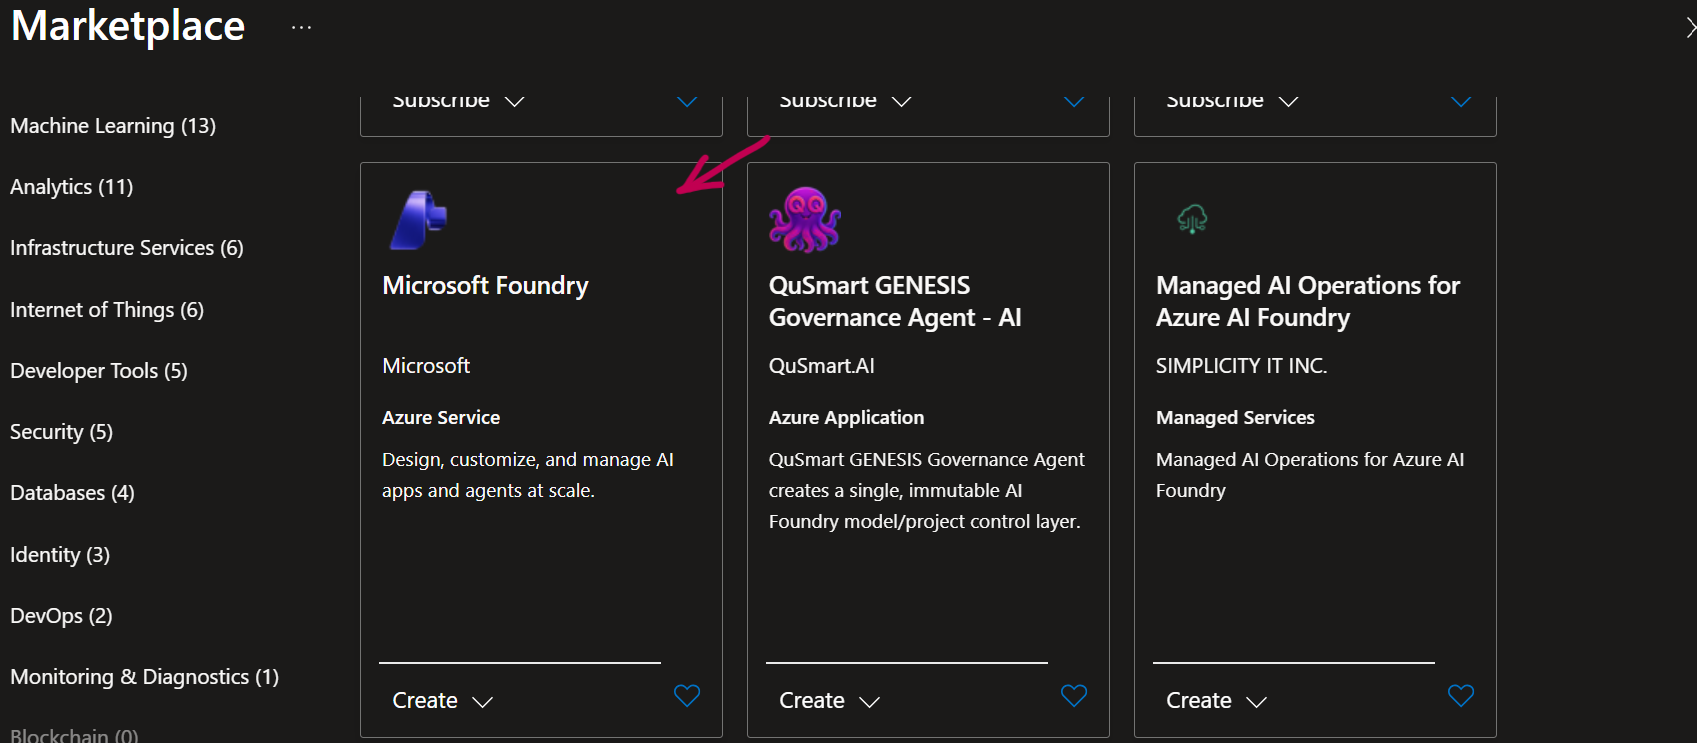
Azure AI Foundry Creation Guide [3]
1. Create the Resource
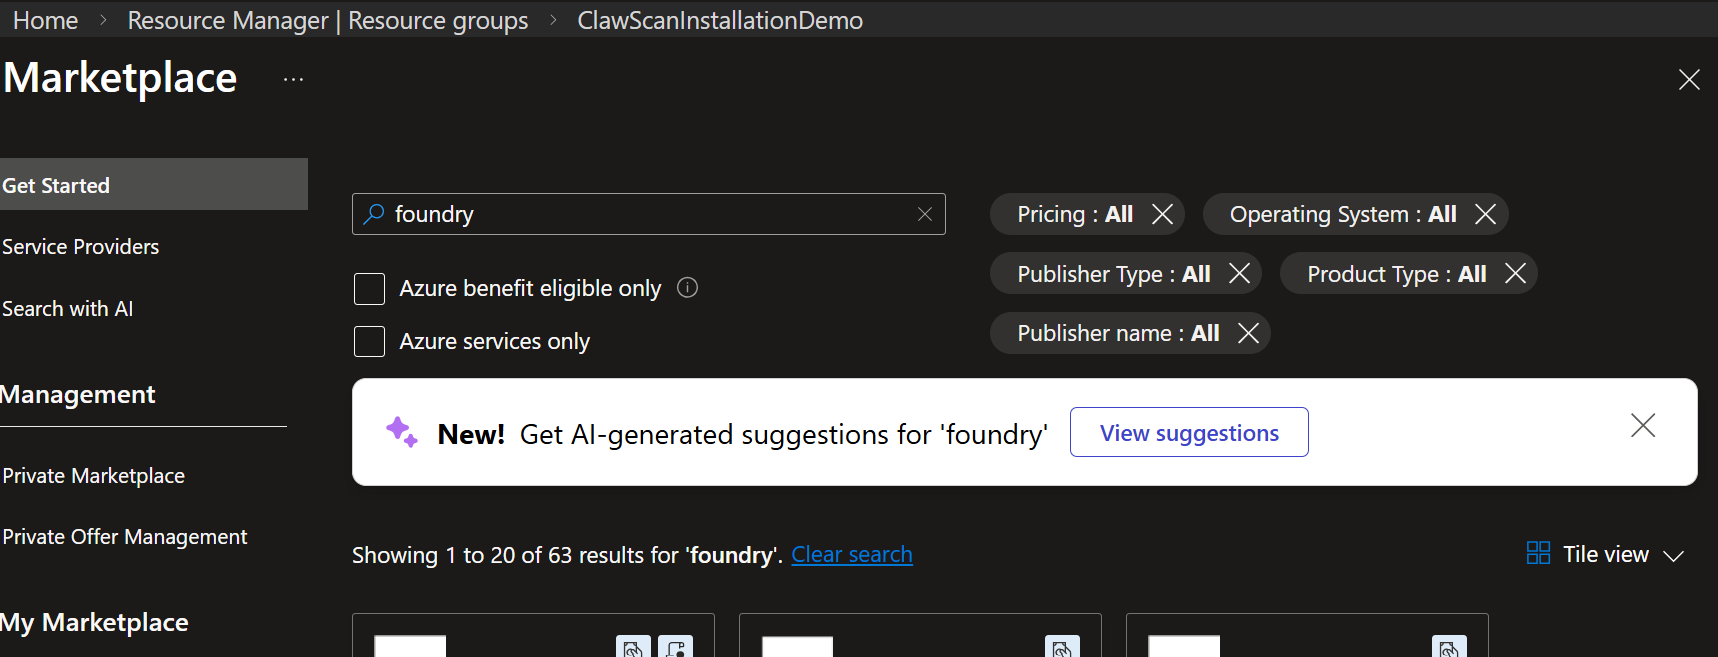
Go to the Azure Portal, click Create a resource, search for "Foundry," and select Microsoft Foundry.
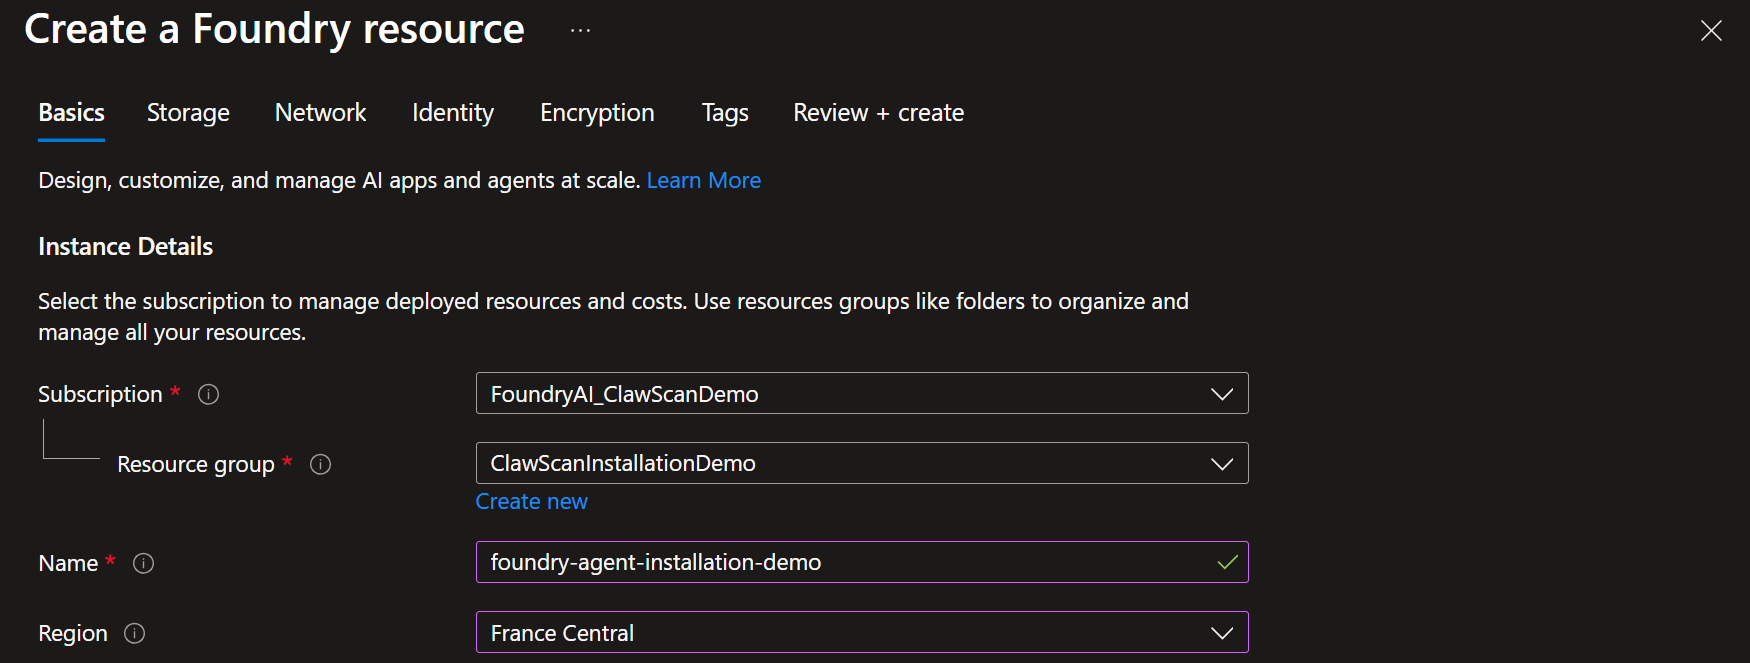
2. Basics Configuration
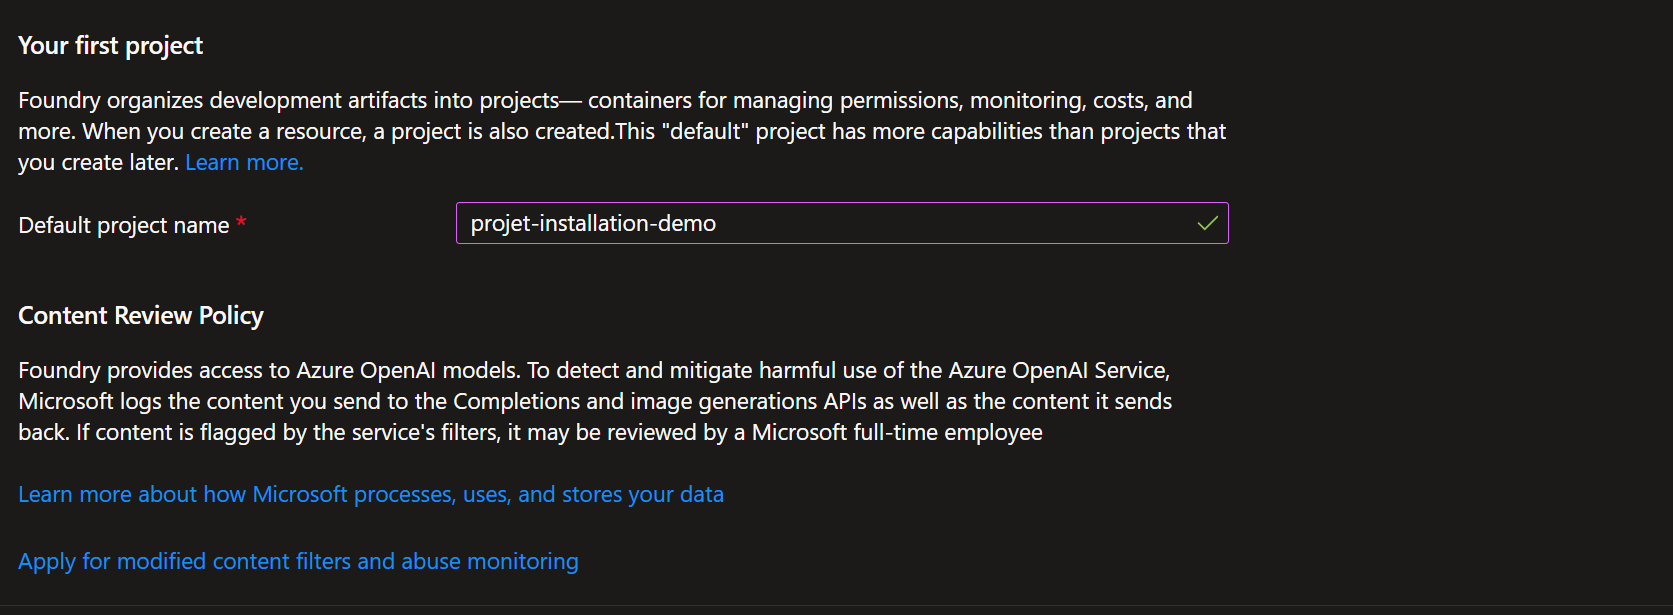
3. Project Creation
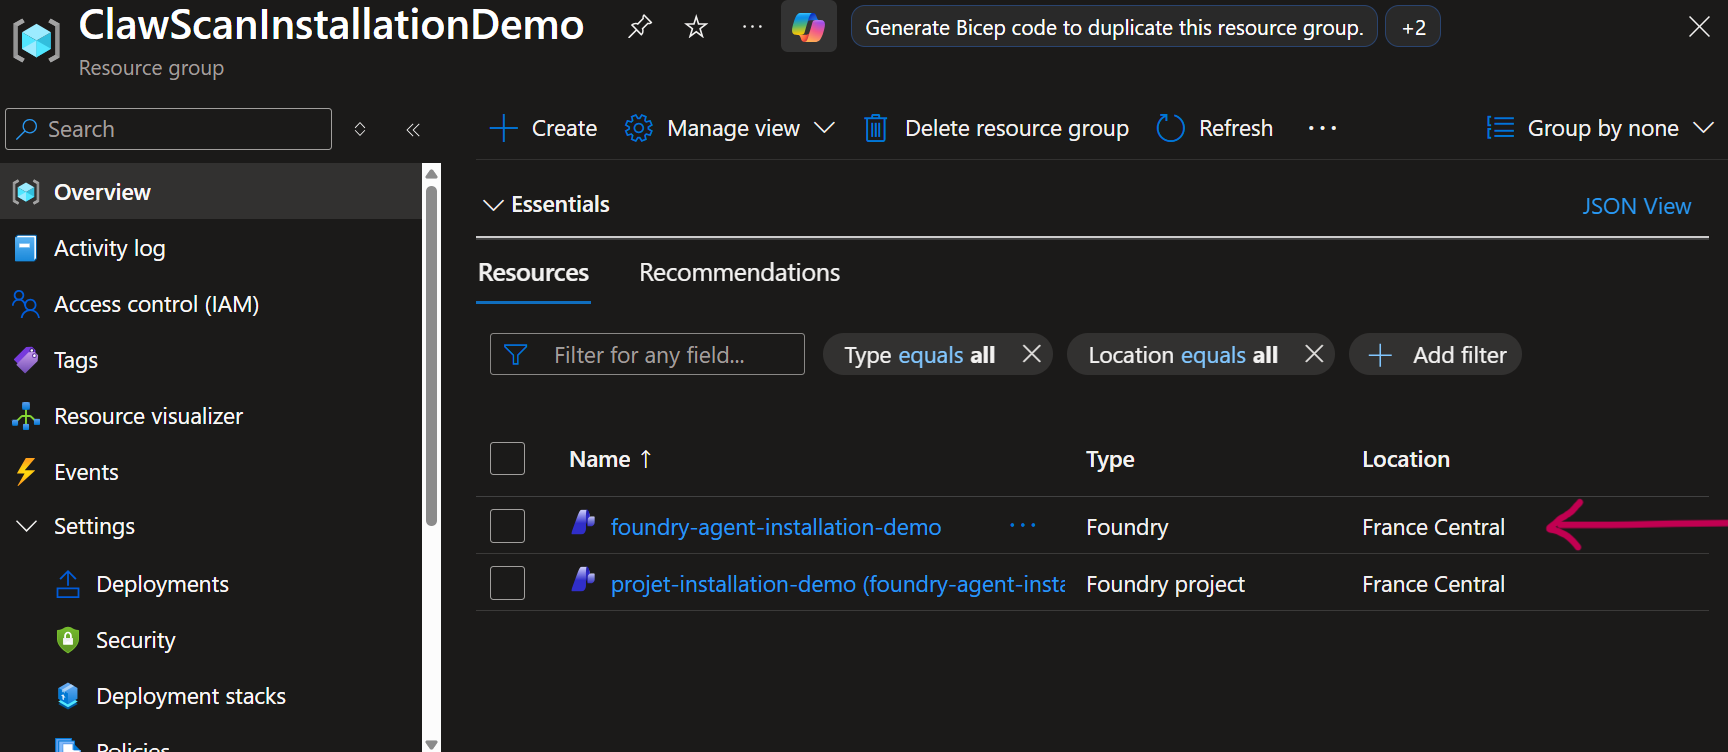
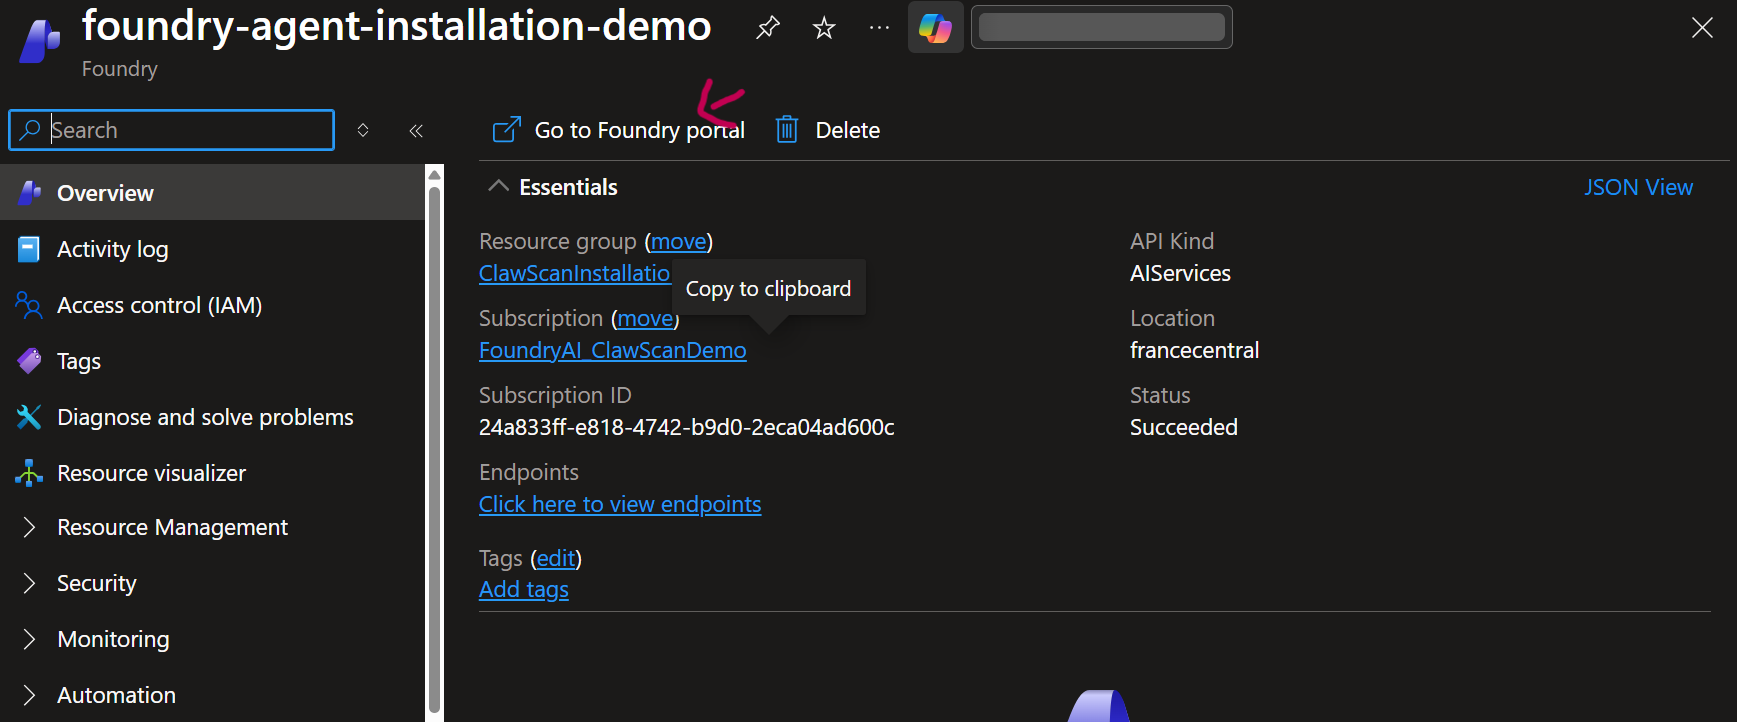
4. Access the Resource
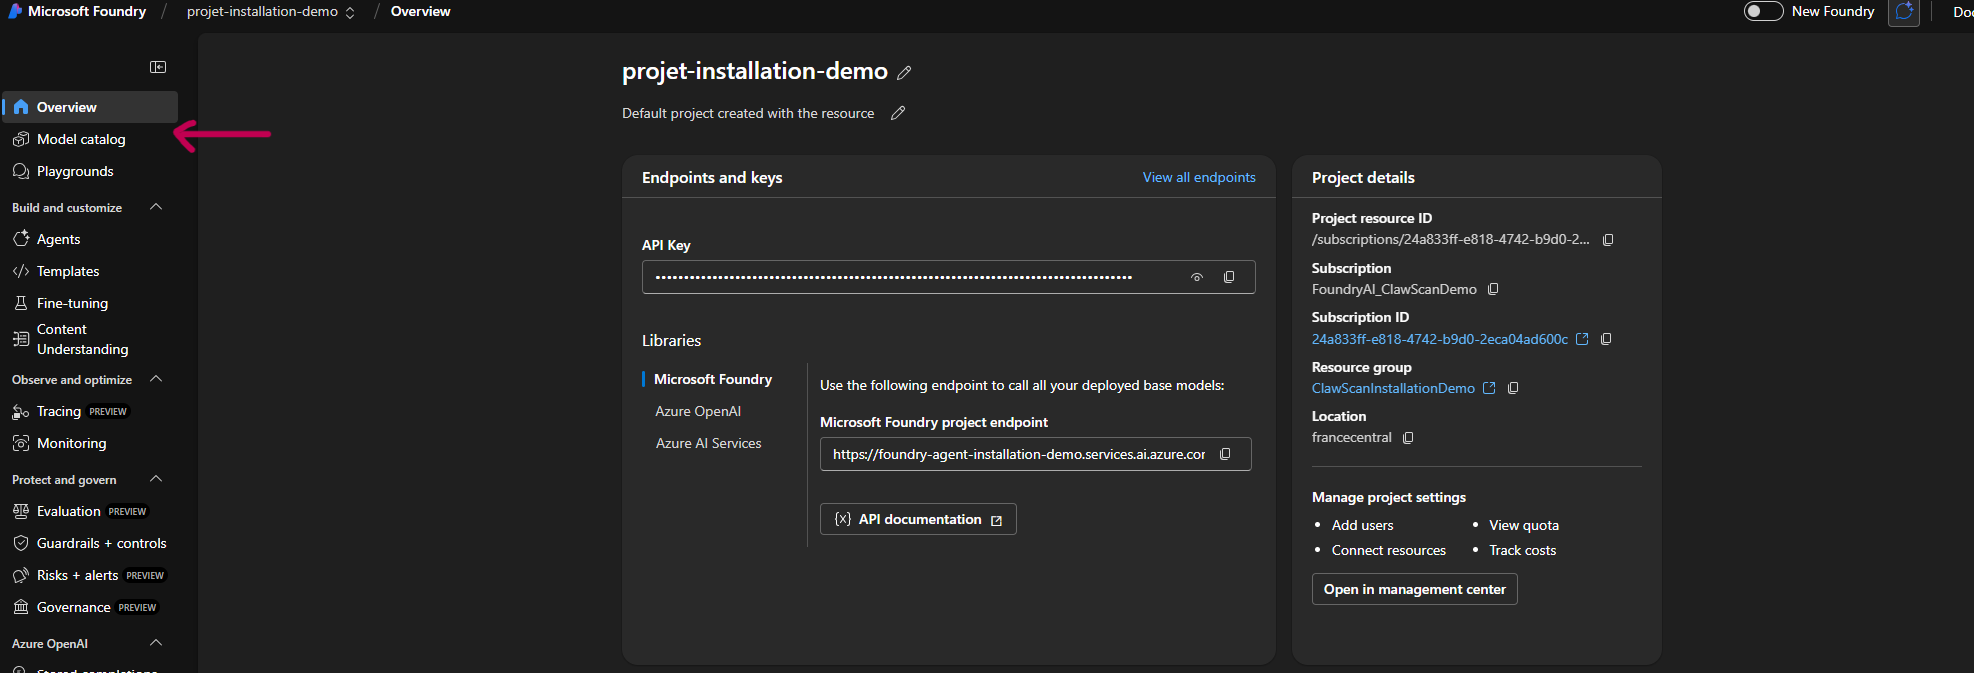
5. Launch the Portal
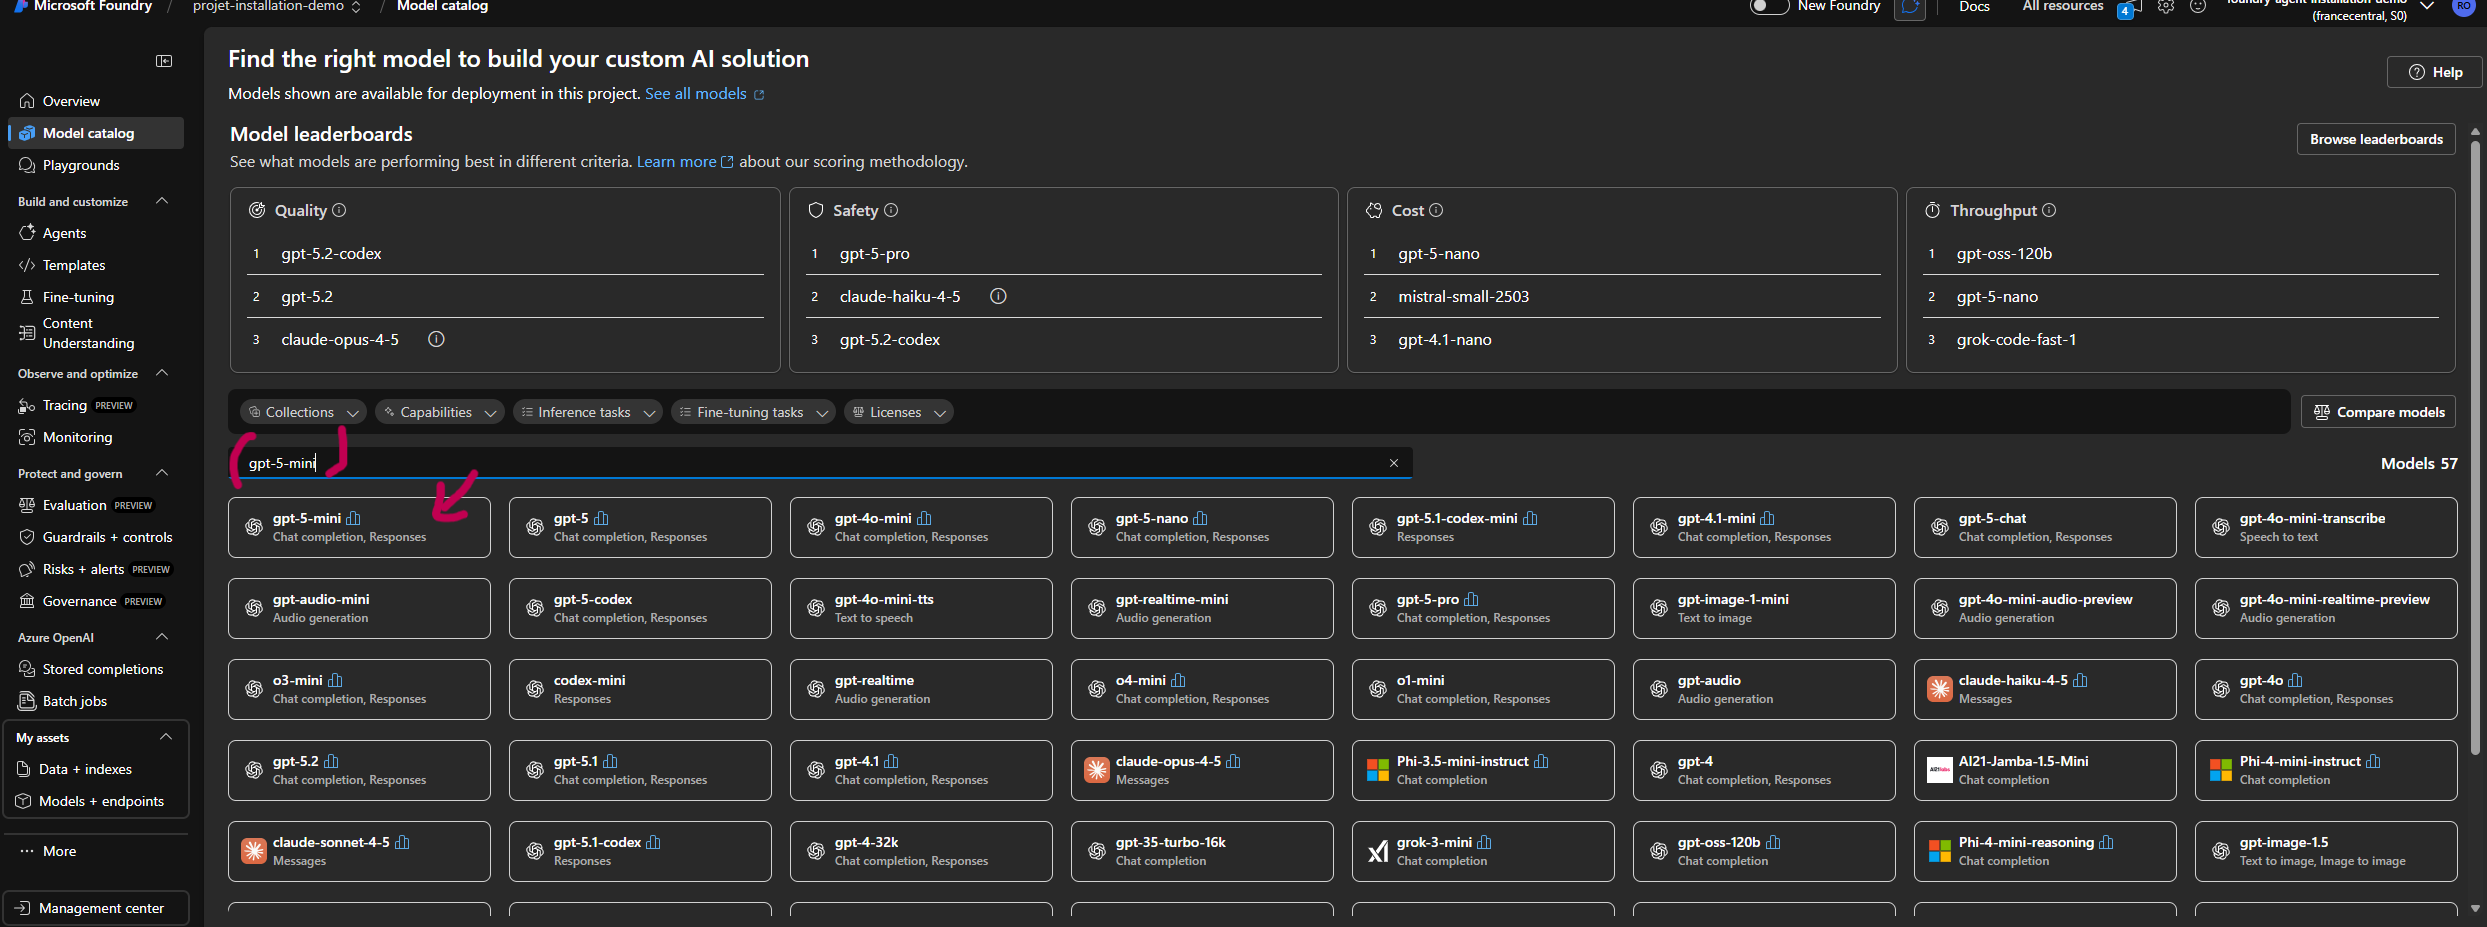
6. Model Catalog
7. Model Selection
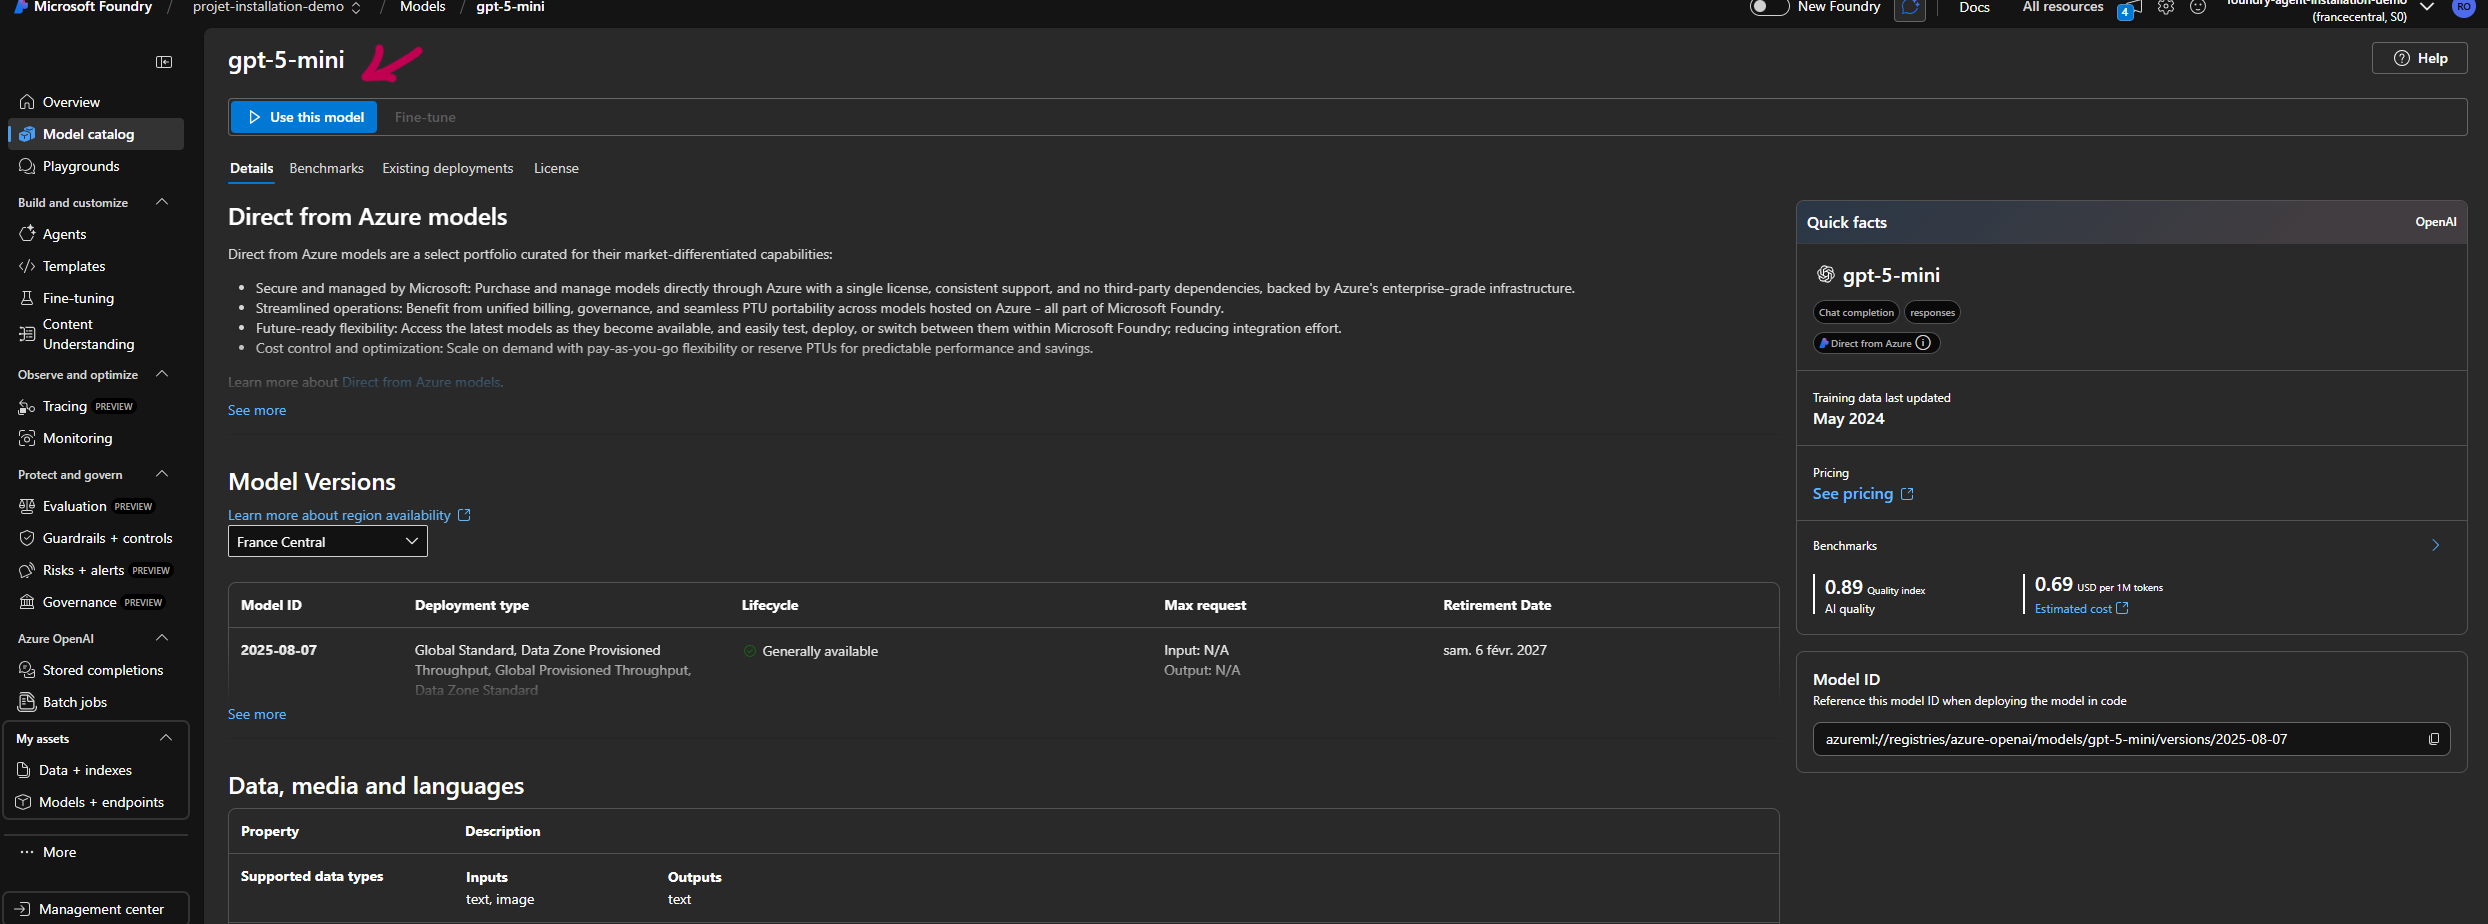
8. Deployment Settings
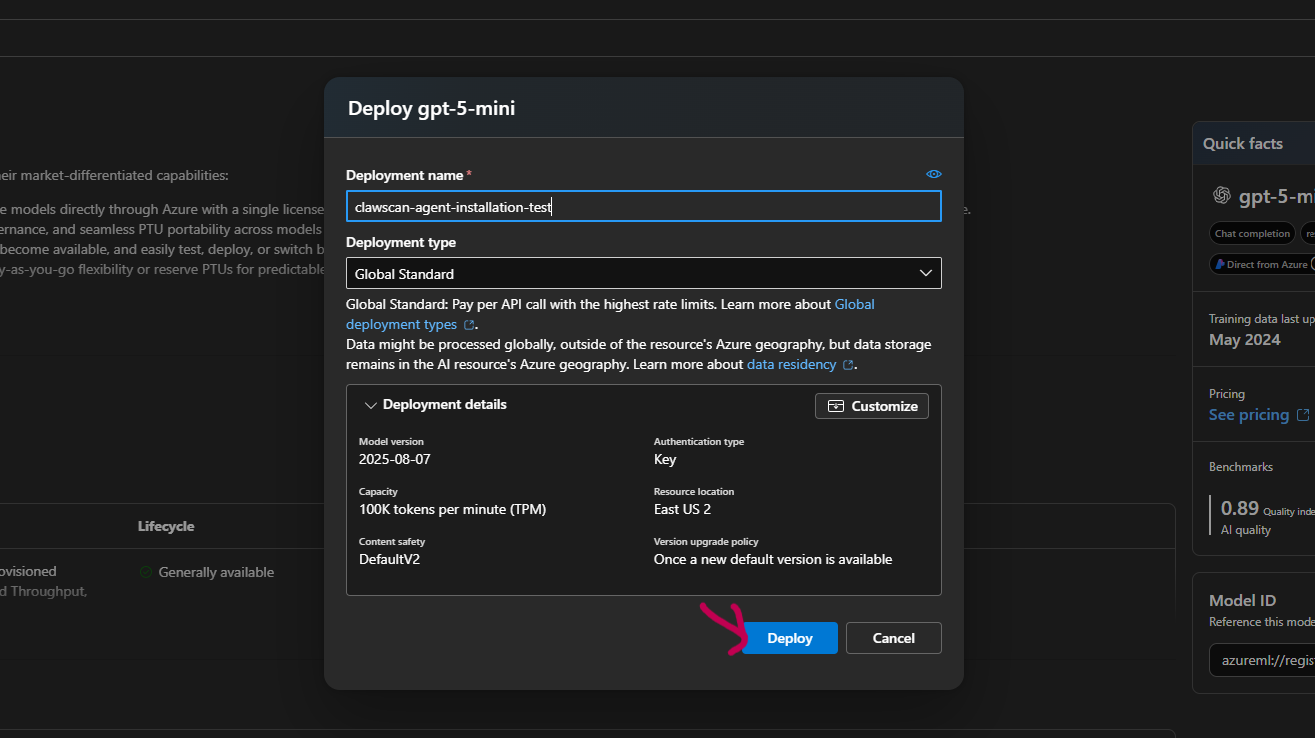
9. Retrieve Credentials
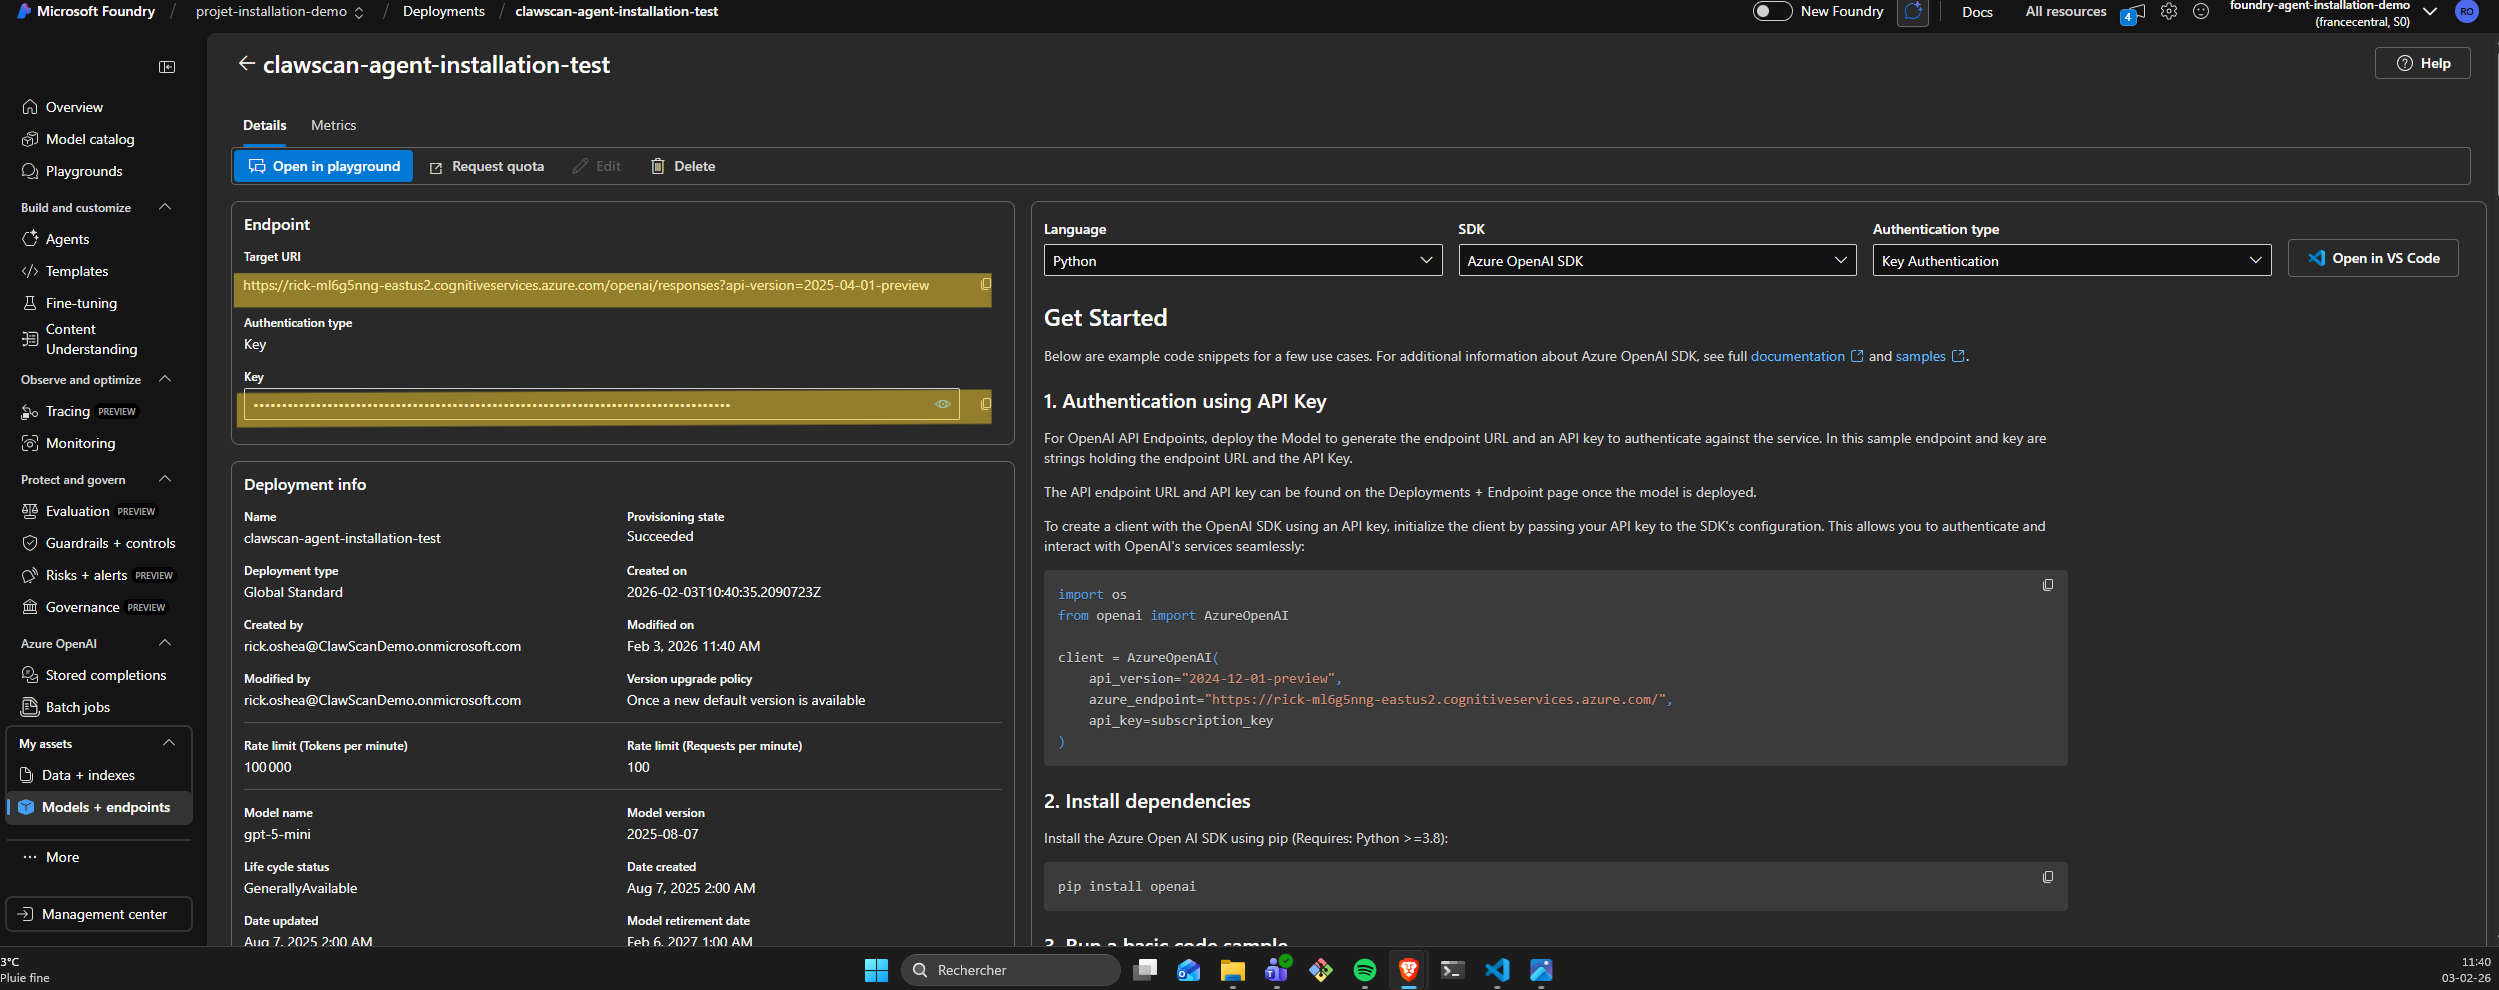
[!WARNING] Conservez précieusement l'URI cible et la clé API pour l'étape 4.
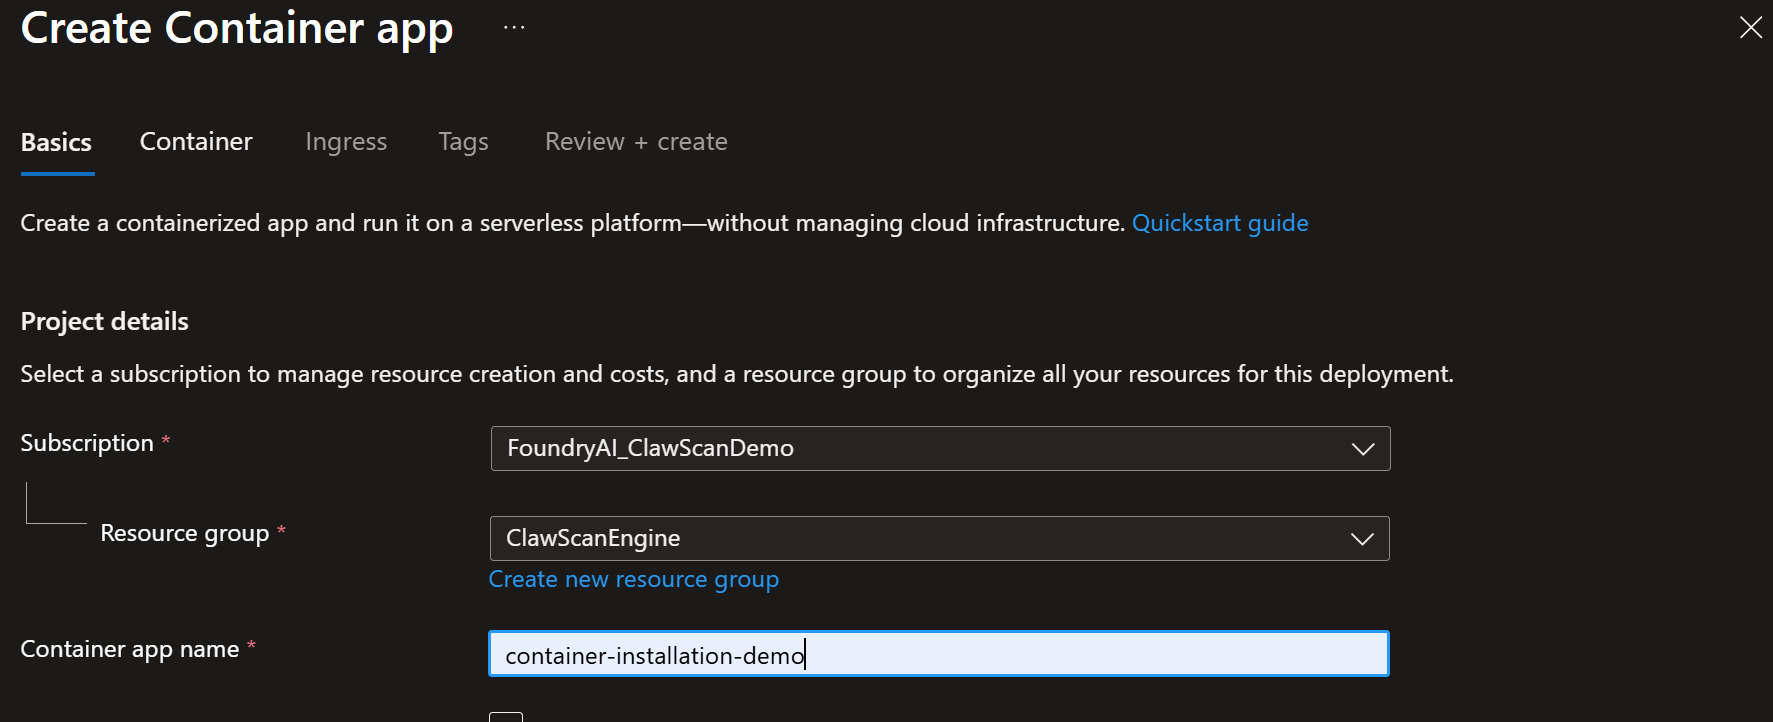
Azure Container Job Creation Guide [4]
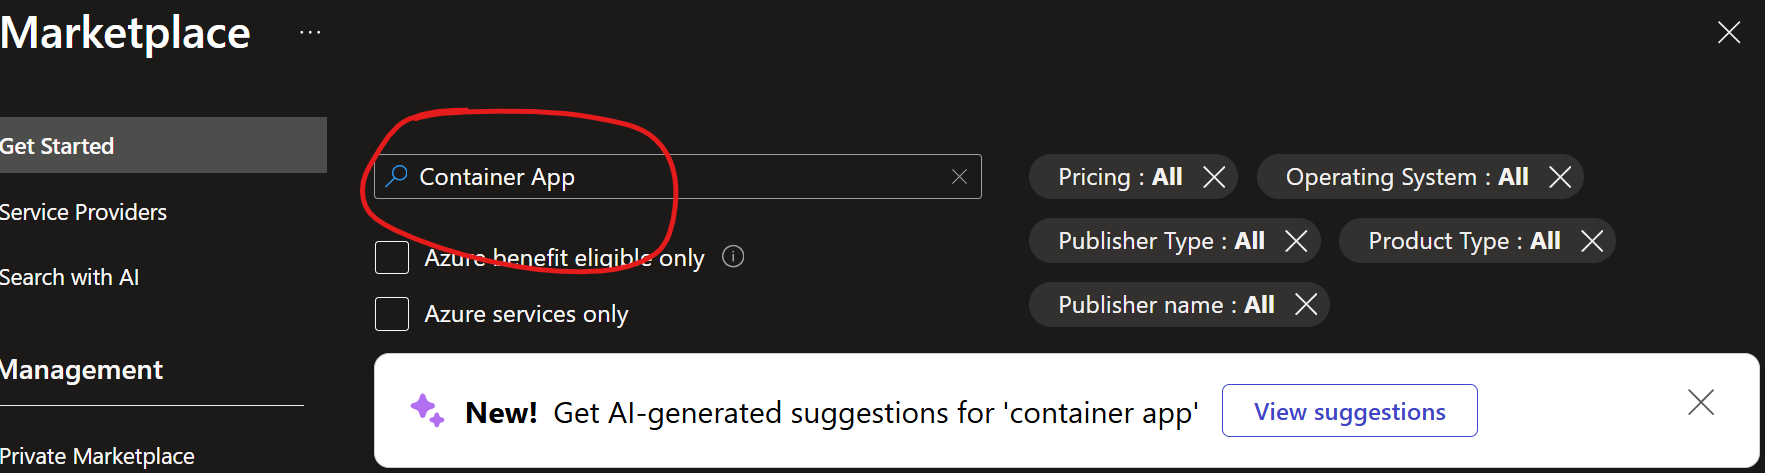
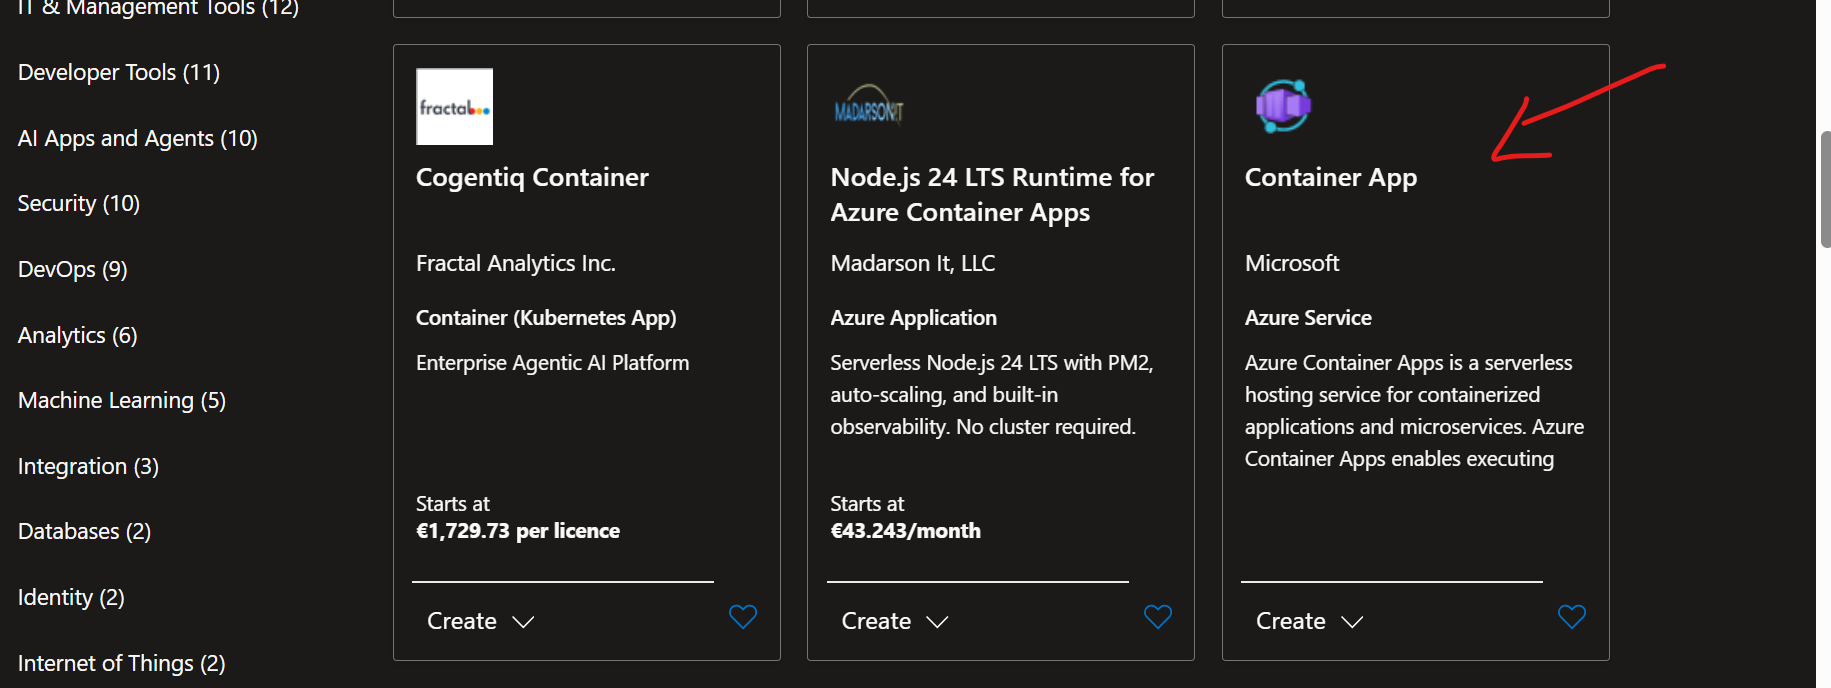
1. Create a New Resource
2. Project Details
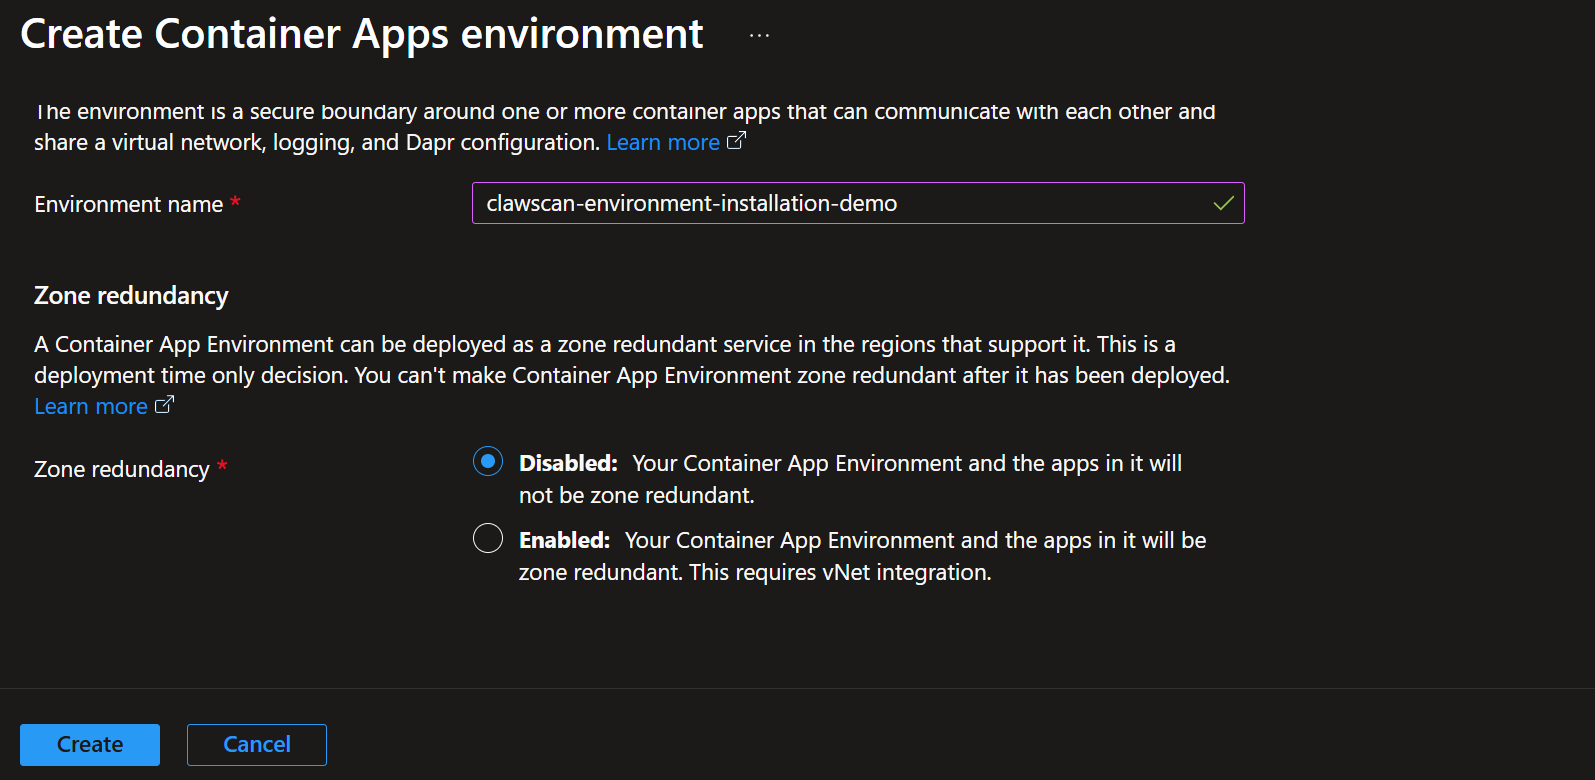
3. Region & Environment

4. Environment Configuration
5. Image Source Registry
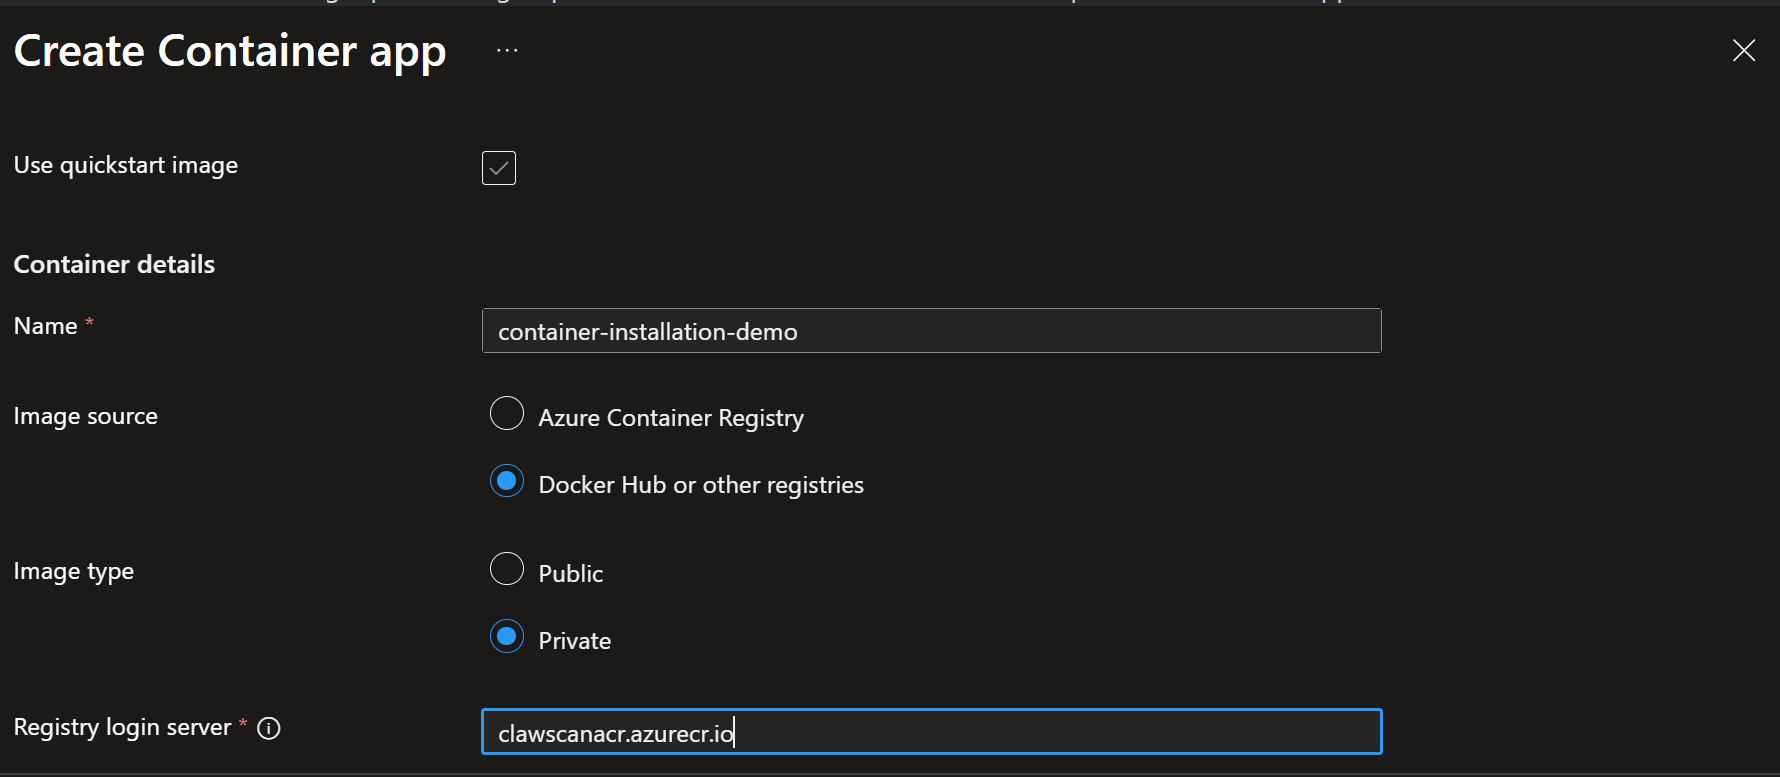
6. Credentials & Authentication

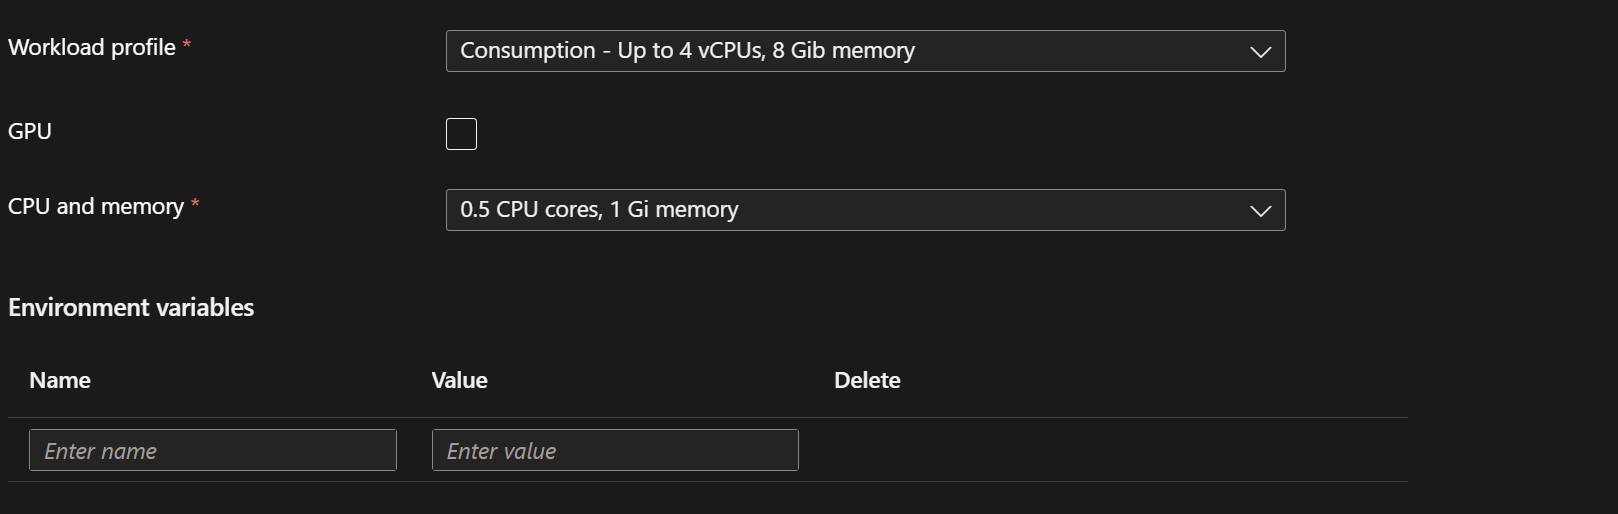
8. Environment Variables
| Variables | Values |
|---|---|
| SHARED_MAILBOXES | **************** |
| TENANT_ID | **************** |
| GRAPH_CLIENT_ID | **************** |
| GRAPH_CLIENT_SECRET | **************** |
| FOUNDRY_API_KEY | **************** |
| FOUNDRY_URL | **************** |
| GET_CONFIG_URL | [Lien de config] |
| POST_RESULT_URL | [Lien de résultat] |
WARNING : Replace the value ***************************************** by your credentials
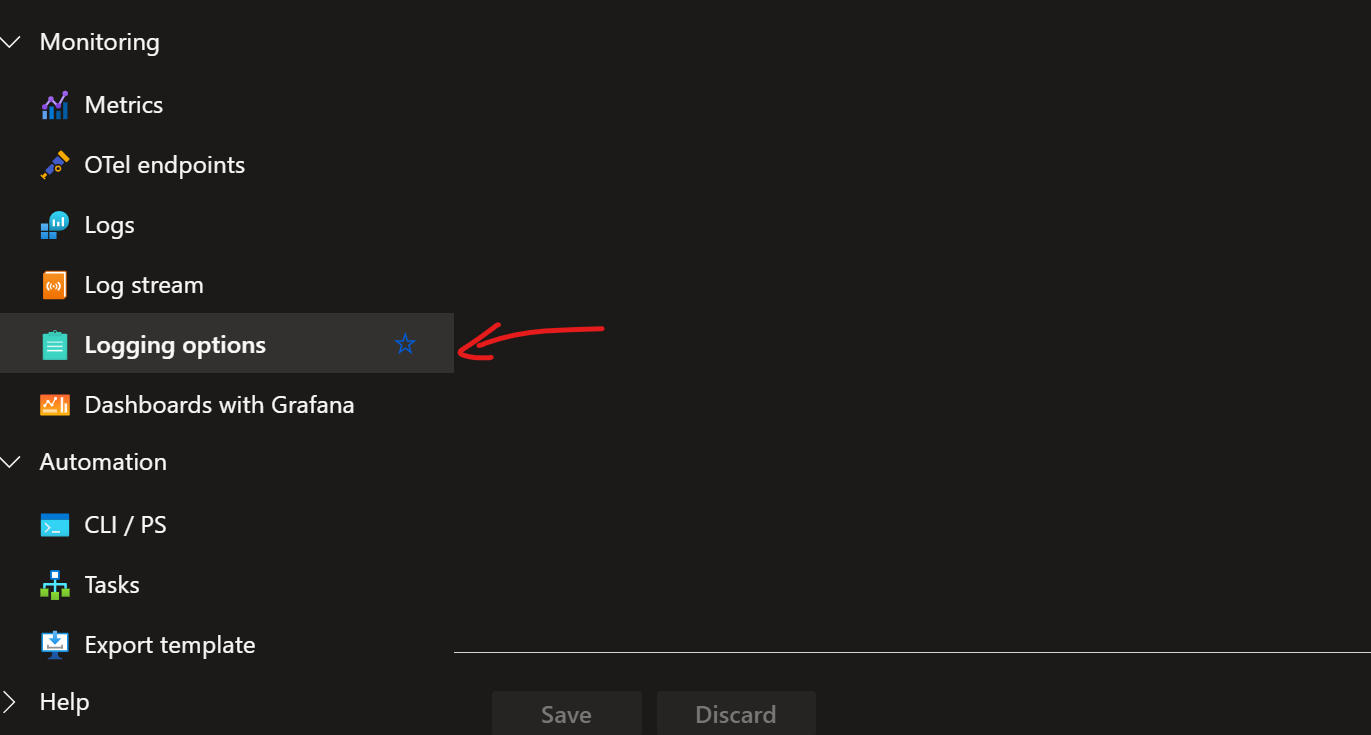
Telemetry and logs [+]
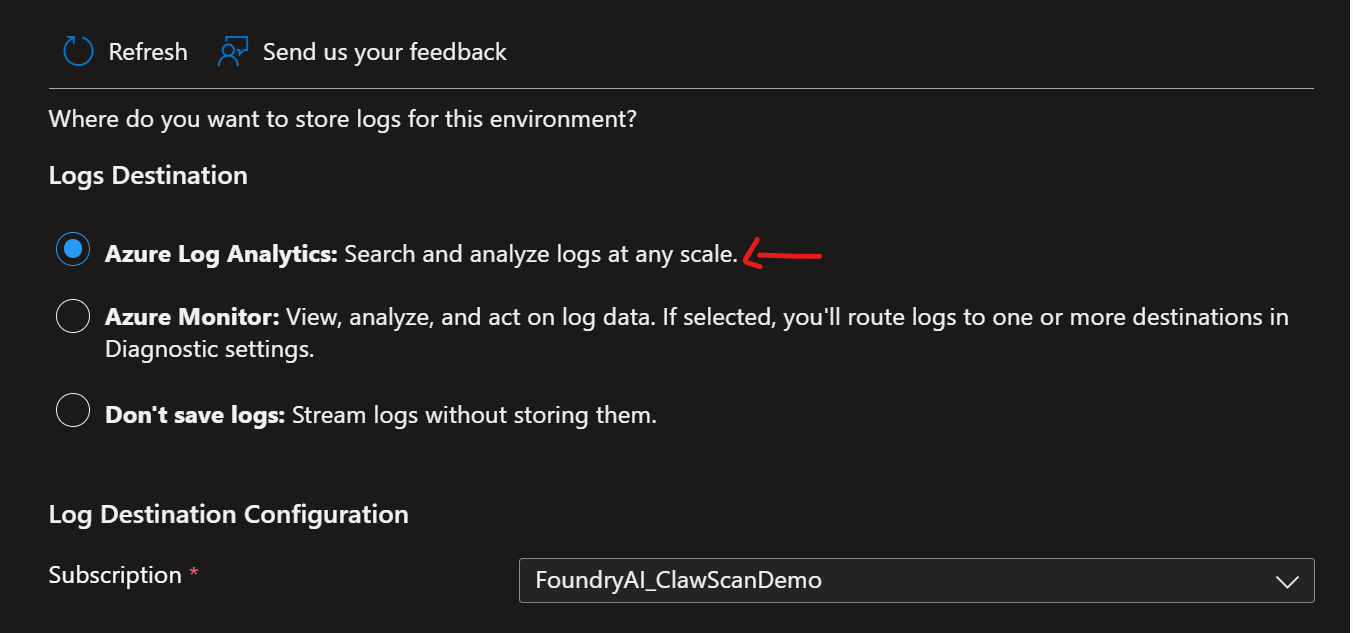
To enable the logs go througt Loggin options under the section Monitoring
Check the option Azure Log Analytics
KQL Query
ContainerAppConsoleLogs_CL
| where RevisionName_s == "votre-revision"
| extend log = parse_json(Log_s)
| where log.service == "CLAWSCAN-WORKER"
| where log.level == "ERROR"
| project TimeGenerated, log.code, log.message, log.severity, log.mailboxId, log.correlationId
| sort by TimeGenerated desc